616.27 MoDOT Fleet Lighting
| Easily printable pdf of Fleet Lighting Levels and Conspicuity Tape |
616.27.1 Fleet Lighting Levels and Conspicuity Tape
616.27.1.1 Fleet Lighting Levels
Level 1
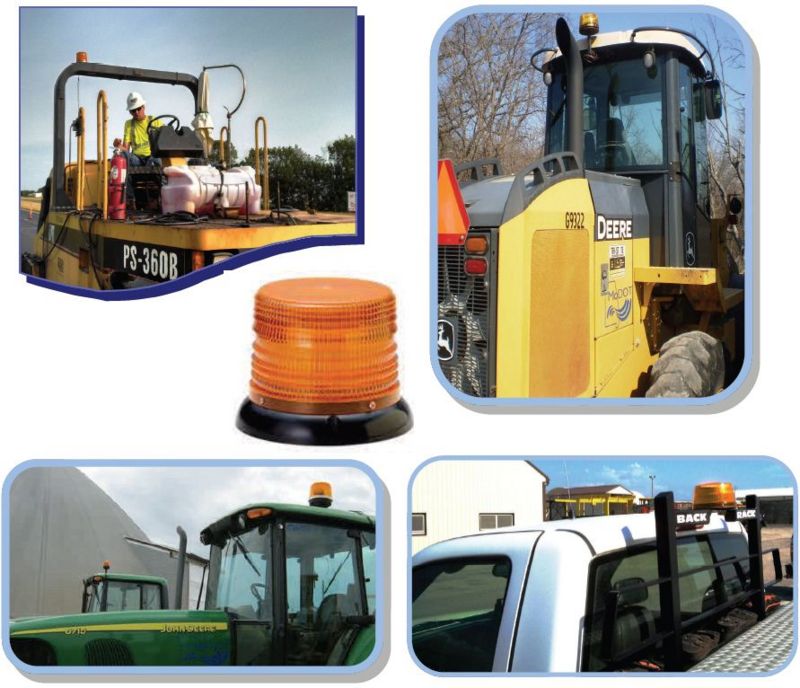
- Definition: Single amber LED beacon with 360 degree visibility.
- Exposure: Very low; generally not stopped in the roadway, used with a protective vehicle, or used for off-roadway work.
- Example: Off-road equipment such as rollers, backhoes, tractors, etc.
Level 2
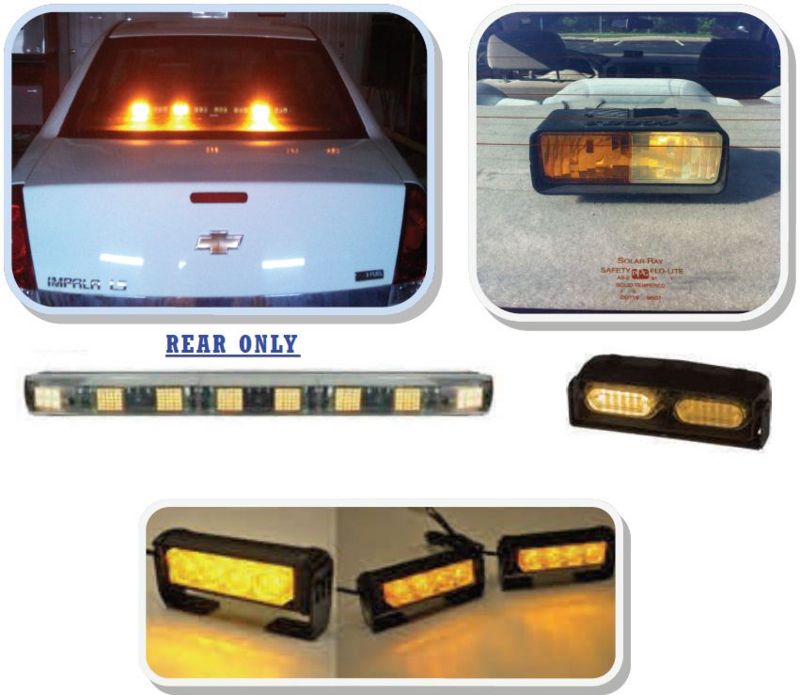
- Definition: Amber or amber/white flasher LED; rear-facing only.
- Exposure: Seldom stopped in the roadway or seldom operates at slow speeds on the roadway.
- Example: Cars, SUVs and vans such as pool cars, administration vehicles, etc.
Level 3
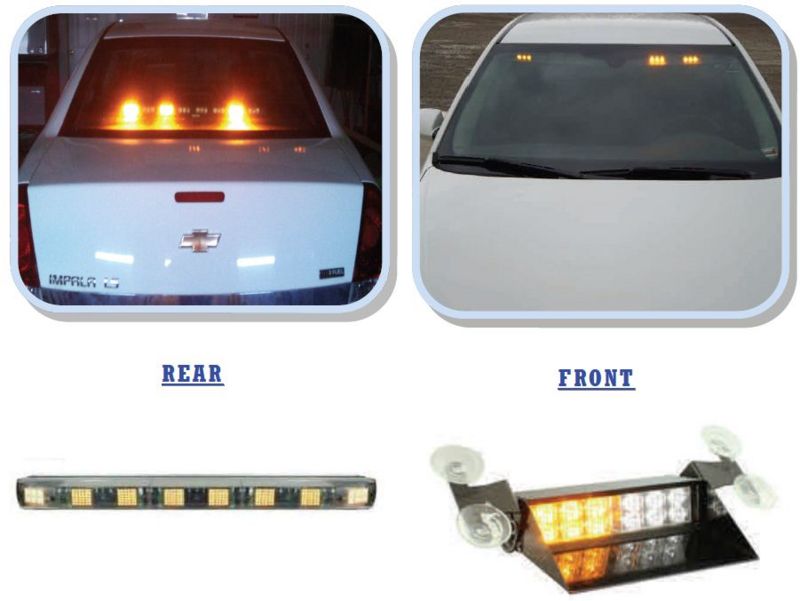
- Definition: Amber or amber/white flasher LED; rear- and forward-facing only.
- Exposure: Periodically stopped in the roadway or periodically operates at slow speeds on the roadway.
- Example: Cars, SUVs and vans that are used for field operations such as some traffic personnel, maintenance and construction administration vehicles, etc.
Level 4
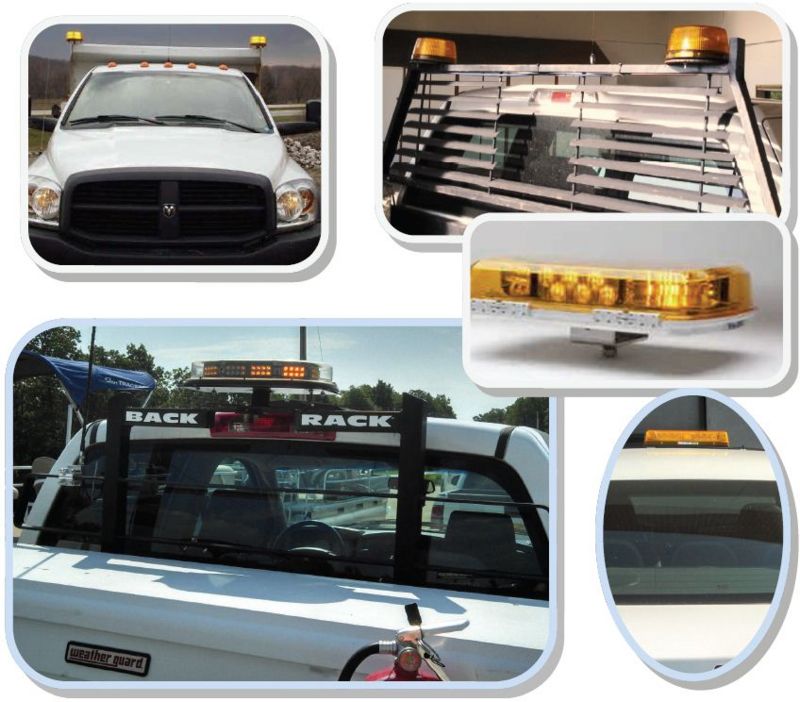
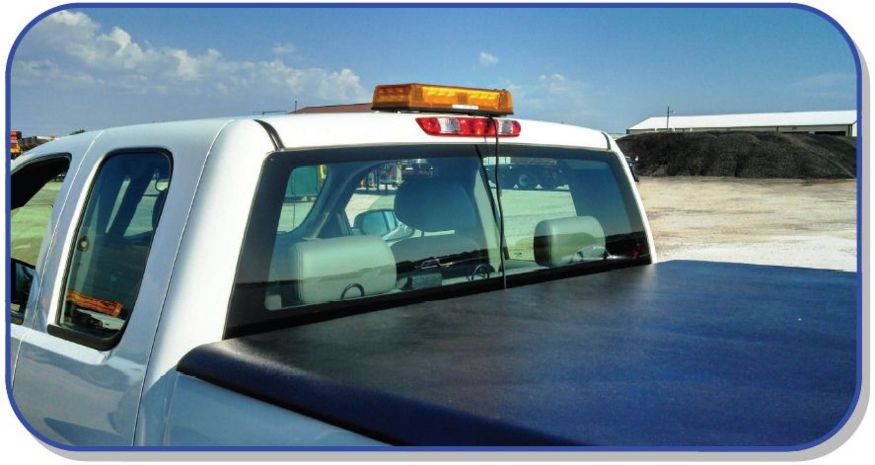
- Definition: Amber or amber/white flasher LED mini lightbars (24” maximum) or two amber flashers with 360 degree visibility.
- Exposure: Frequently stopped in the roadway or frequently operates at slow speeds on the roadway, may also be used as a protective truck.
- Example: Trucks, SUVs, heavy duty trucks, XHD trucks, etc. that are used by field personnel such as project office, traffic, or maintenance staffs that are commonly used in exposure limits listed above or may respond to emergency situations.
Level 5
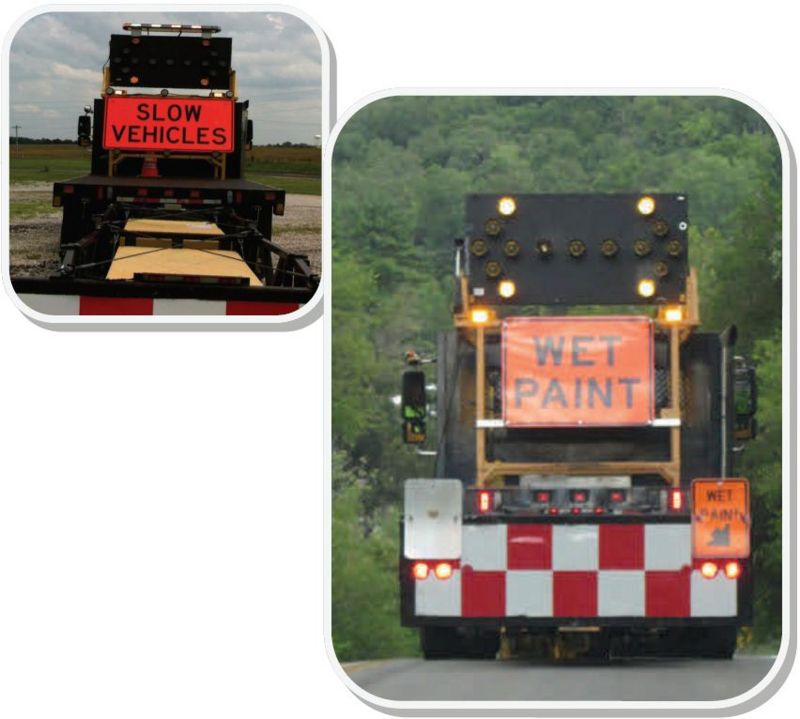
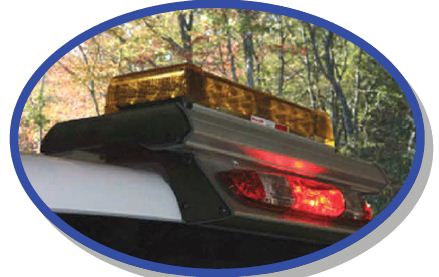
- Definition: Level 4 with additional TMA light bar and emergency alert lighting.
- Exposure: Very High. The Light Bar may be used and the Emergency Alert lights should be used on the Rear Advanced Warning Truck for striping and sweeping operations and are optional on other mobile operations. If used, the rear facing amber/white Light Bar is installed on top of the vehicle and the Emergency Alert lights are installed below the flashing arrow panel.
- Example: Rear advance warning TMA truck for mobile operations.
616.27.1.2 Conspicuity Tape
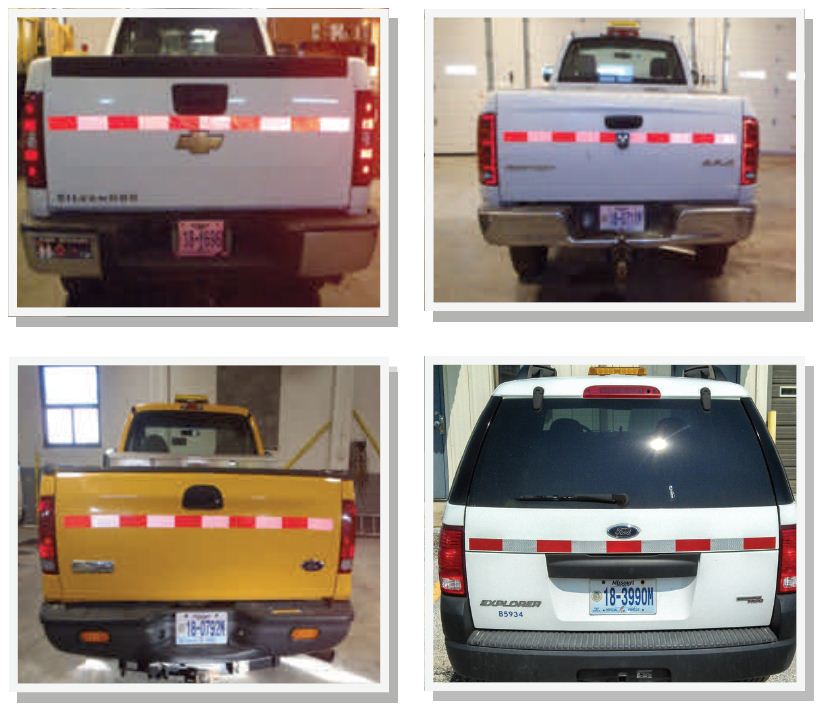
- Definition: Conspicuity tape should be installed on all SUVs and pickups. While there is no standard for installation, it is recommended that the tape should be installed approximately 13” from the bottom of the tailgate. The tape shall be red/white combination and should be installed with the red starting on the drivers side as per the examples below.
616.27.1.3 Example Applications and Best Practices
Installation and Purchasing Best Practices
- For new vehicles, the purchaser of the lighting equipment should contact the ORG’s supervisor to whom the vehicle will be assigned to verify the intended use and classification of lightng. If the type of lighting necessary is not clear, the district’s “approval of exceptions” should be consulted.
- Only persons authorized by the district and/or who are familiar with the guidelines and best practices should purchase or install fleet lighting.
- When making a purchase, do so from a reputable vendor and require certification of the testing requirements. Also, make sure you discuss with the vendor the desired application to ensure the product is correctly utilized.
- Before making a large purchase, ask for a demo and/or try out a small quantity to make sure they perform adequately.
- Level 4 Lighting in excess of two rotating beacons or a 24 in. light bar should be approved by the district’s representative for approving exceptions to the minimum requirements.
- Per the policy, no suction cup and/or magnets should be used for final installation.
- Installation should be as “clean” as possible with no hanging or unsecured lighting inside or outside of the vehicle.
- Beacons or mini-light bars should be installed at the highest point possible and should not be blocked by any equipment such as v-beds, luggage racks, etc.
- For higher intensity lighting such as longer light bars, bright white LEDs, etc. the use of a dimmer function should be considered for use during nightime operations.
- The switch for the fleet lighting shall be easily accessible and visible to the operator. If possible, the switch should have an indication light to prevent the light being inadvertently left on.
- The light should not be installed in such a fashion that could cause a reflective glare inside of the equipment/vehicle that could cause interference with its operation.
- If possible, the switch should not utilize a factory power supply or cigarette lighter.
Examples
- Comments
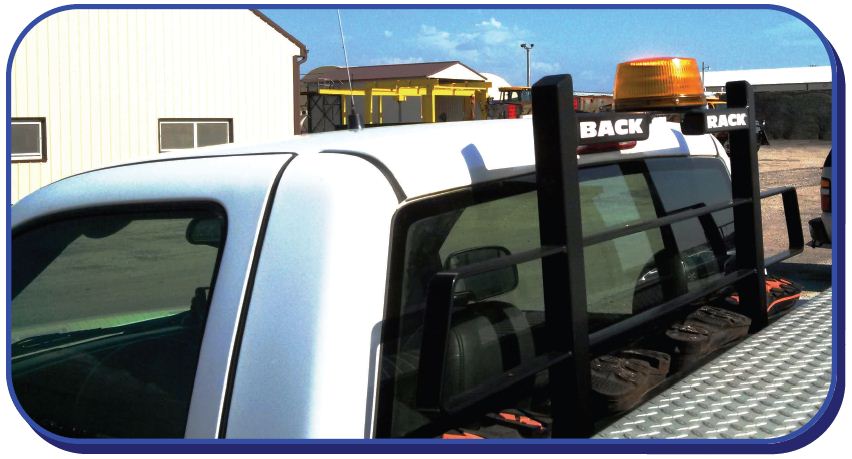
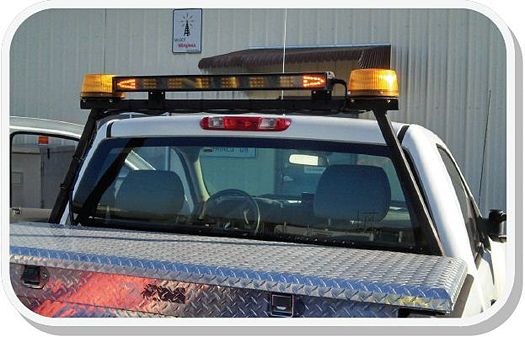
- Good: Location of light at the highest location on the vehicle.
- Good: Permanent installation of switch in the vehicle and hidden wiring.
- Good: Light secured well and excellent overall installation.
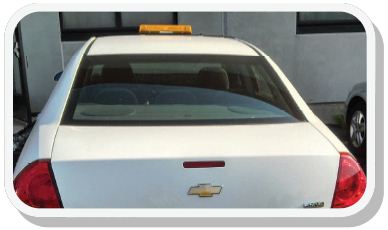
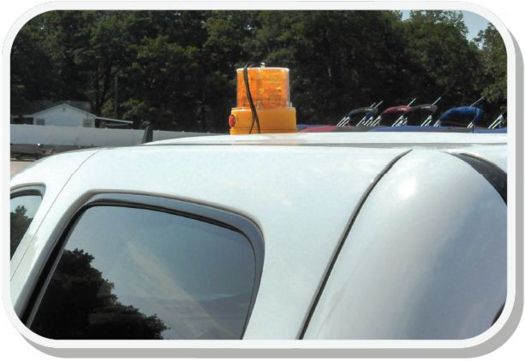
- Bad: Does not meet the minimum standard for level of lighting.
- The Need
- Upgrade to Level 4 Lighting as per the Fleet Lighting Guidelines.
- How?
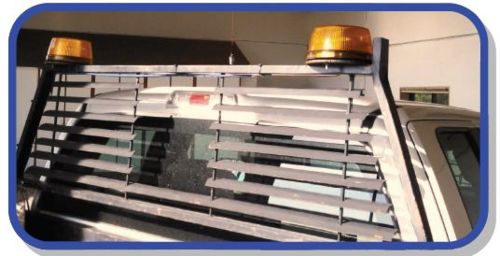
- Remove the LED Beacon and replace with two LED beacons on each side of the rack (as shown, right) OR install a single mini LED lightbar at the center of the rack.
- Comments
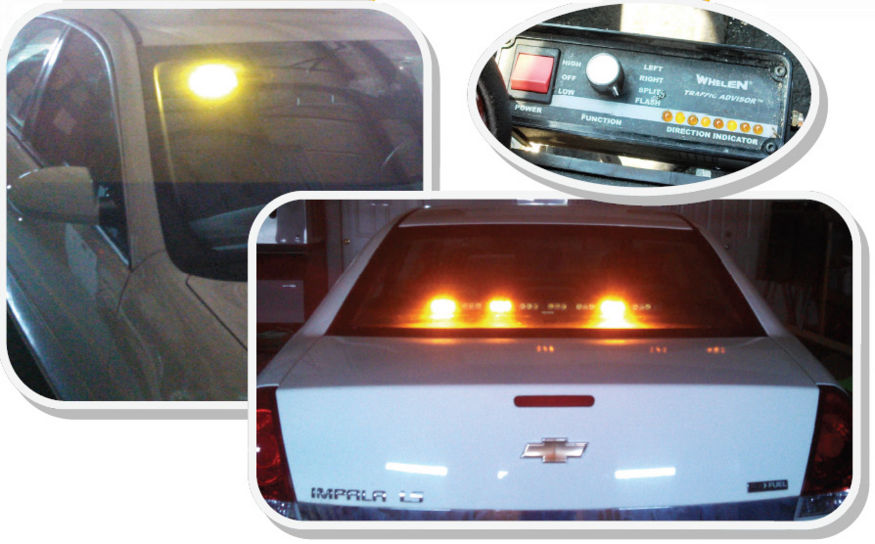
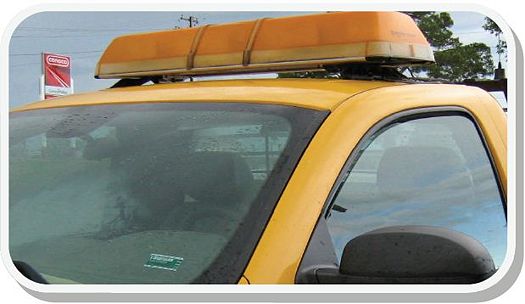
- Bad: Magnetic light installation.
- Not Preferred: Wiring exposed and not secured outside of cab.
- Not Preferred: Switch installed in power outlet inside cab.
- OK: Amber LED lightbar.
- The Need
- Replace magnetic lighting system with a more permanent, fixed installation.
- How?
- Replace the current light in a manufacture provided mounting system that secures in the cab brake light (example shown, right) or provide a more secure method of mounting the current light.
- Comments
- Not Preferred: Front light is mounted to visor and visor is folded down when in use. This creates a glare in the vehicle when in use and is not easily accessible to driver.
- Good: Light controls allow dimming and multiple functions.
- Good: Wiring is hidden and light in rear deck and controls are securely mounted.
- The Need
- This vehicle is used by construction inspectors and maintenance personnel for sign layout and logging. It falls into the high exposure category and will need to be upgraded to Level 4 360 degree lighting.
- How?
- Add a 360 degree mini lightbar to the roof of vehicle, shown to the right. The additional lighting already in place may be removed but could be used to supplement the lightbar during daylight operations.
616.27.1.4 Additional Examples
616.27.1.5 Fleet Lighting Guidelines
- Purpose: To increase the visibility of MoDOT vehicles by establishing an adequate minimum level of warning lighting on MoDOT equipment, to increase the safety of our employees as well as the traveling public, and improve consistency due to increased sharing between districts and divisions.
Warning light guidelines for specific MoDOT vehicles are outlined in the chart below. The intent of these guidelines is for every MoDOT vehicle to have a minimum level of fleet lighting in addition to manufacturer provided lighting. The fleet lighting level increases with the level of exposure.
Recommended Minimum Lighting Levels Table
| Exposure | Vehicle Type Examples | Lighting Level |
|---|---|---|
| Very Low - Generally not stopped in roadway,used with protective vehicle, or used for off-roadway work | Off-road equipment (loader, backhoe, tractor, motorgrader, etc.) | Level 1 - Single amber LED beacon with 360 degree visibility |
| Low - Seldom stopped in roadway or seldom operates at slow speeds on roadway | Cars, SUVs and vans - pool and administrative vehicles | Level 2 - Amber or amber/white flasher – rear-facing |
| Medium - Periodically stopped in roadway or periodically operates at slow speeds on roadway | Cars, SUVs and vans – field operations vehicles | Level 3 - Amber or amber/white flasher – rear- and forward-facing |
| High - Frequently stopped in roadway or frequently operates at slow speeds on roadway, may be used as protective truck | Other licensed vehicles (pickups, LD trucks, HD trucks, XHD trucks, etc.) | Level 4 - Two amber flashers or mini -lightbar (24 in. max.) with 360 degree visibility |
| Very High - First protective truck located in the lane of traffic as described in Level 5 (rear advance warning TMA truck) | Rear advance warning TMA trucks | Level 5 - Level 4 with additional TMA light bar and emergency alert lighting |
- All vehicles and equipment purchased after July 1, 2013 should comply with these guidelines. Vehicles requiring fleet lighting repairs will be upgraded to comply with these guidelines depending on remaining life of the vehicle.
- All lighting should meet SAEJ595 or SAE J845 Class 1 standard, verified by an AMECA (Automotive Manufacturers Equipment Compliance Agency) certified lab.
- All lighting equipment should be permanently attached to the vehicle, magnetic and suction type devices should be avoided.
- Newly purchased dump trucks should be equipped with the current warning light system as outlined in the Dump Truck Specifications. Existing dump trucks requiring retrofitting or repairs to the lighting system should comply with the current Dump Truck Specifications if the vehicle will remain in the fleet for at least one year.
- The manufacturer must approve supplemental lighting to any mobile attenuator.
- Specialty vehicles used in mobile operations should have 360 degree coverage with self-contained LED units using mounting specifics dictated by the physical characteristics of the vehicle. Examples may include striper trucks, sweepers, ARAN vans, etc.
- Lighting purchases that exceed the recommended minimum levels should have management approval (District Engineer/division head or his/her designee). Examples may include vehicles and equipment related to incident response, motorist assist, traffic signal operations, vehicles placed in high traffic conditions found in urban areas, etc.
- Emergency Response and Motorist Assist vehicles have standardized lighting and equipment that has been established in the Emergency Vehicle SOP and a standardized Emergency Vehicle Decal Package that has been approved by Senior Management and shall not be deviated from.
- Conspicuity tape should be used on pickups and SUVs for additional visibility.
The research project NCHRP 13-02 was undertaken to evaluate the effectiveness of warning lights on roadway maintenance vehicles with the goal of establishing guidelines for the application of the lighting system on the vehicle. The research was done in two efforts. The first was an evaluation of the lighting parameters that define the performance in terms of glare and vehicle detectability. The second was an evaluation of the lighting systems in adverse weather and in a dynamic setting. The following recommendations and considerations come from the NCHRP 13-02 report.
- Light Source: Because the spectral output of the source is very pure, solid-state LED sources seem to provide a benefit with some colors. LED sources also provide an equivalent amount of light at reduced wattage that may be beneficial to the vehicle in terms of electrical system loading.
- Color: It is recommended that amber, or a combination of amber and white, lighting be used on maintenance vehicles, with amber being the predominant color.
- Flash Pattern: It is recommended that the predominant light pattern be flashing. A pattern which alternates from one side of the vehicle to the other is preferable to one in which lights on both sides of the vehicle are flashing at the same time. It is also recommended that a slower flash frequency be used, since this will give a higher response to the longer light pattern than a short flash. A flash pattern such as a double flash or a pattern similar to a rotating beacon will provide an appearance that enables vehicle identification and should improve response.
- Light Positioning: Lights should be placed high on vehicle and away from the taillights to improve vehicle identification distance.
- Intensity Requirements: Using too many lights or lights with too high an effective intensity may impede the ability of other drivers to detect a pedestrian.
- Since most maintenance vehicles are used both in the day and at night, a system that dims the lighting for nighttime operation could be important.
The standards and/or reports referenced in the development of the above guidelines include:
- NCHRP 13-02, Guidelines for the Selection and Application of Warning Lights on Roadway Operations Equipment, March 31, 2008
- SAE J845 (Warning Devices for Authorized Emergency, Maintenance, and Service Vehicles) May 1997, Class 1, Class 2, Class 3
- SAE J595 (Warning Devices for Authorized Emergency, Maintenance, and Service Vehicles) November 2008, Class 1, Class 2, Class 3
616.27.2 Aerial Equipment Lighting
Purpose
To increase the visibility of MoDOT aerial vehicles working in conditions which require 360 degree visibility for the safety of employees as well as the traveling public, and to improve consistency across the state.
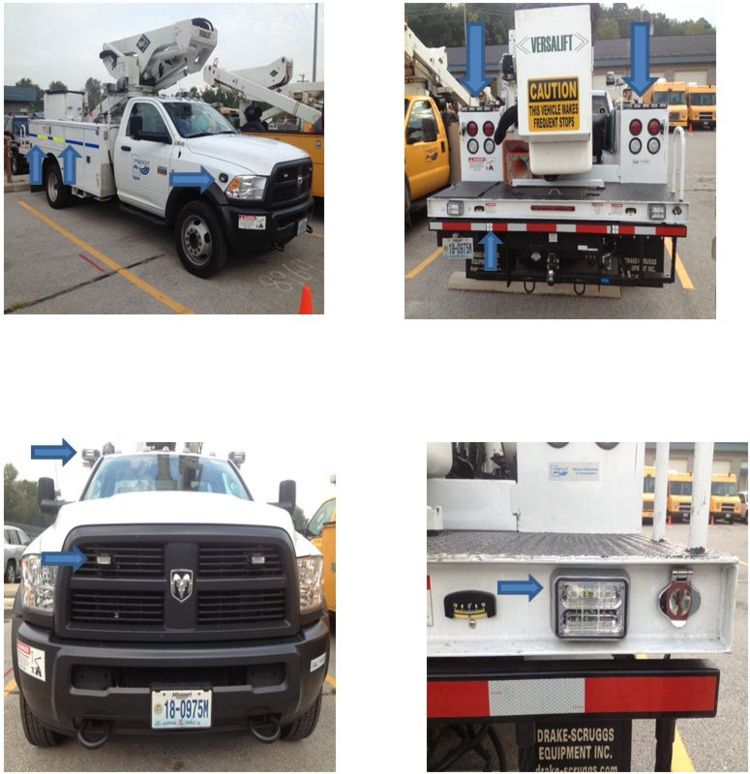
Standard Light Package
- 1. Two amber/white light heads placed in the grill of the truck.
- 2. Two amber/white light heads shall be placed on each end of the rear bumper.
- 3. Two amber/white light heads shall be placed just behind and above the cab to allow for 360 degree visibility.
- 4. Two amber/white/steady burn white option light heads shall be positioned on each side of the vehicle, one near the rear corner and one near the front corner. Steady burn option allows for PPE illumination in nighttime conditions.
- 5. A traffic advisor will be placed at the rear of the vehicle on the top of the truck body to allow for left, right, dual movement indications around the vehicle as well as a caution mode (same operation as an arrow stick).
- 6. Conspicuity tape will be placed on the rear and sides of the vehicle.
- 7. The amber and white lights in all light heads shall alternate between the two colors (flash sequence).
Implementation Plan
Upgrade all units by July 1, 2014 unless planned for trade before December 31, 2014.
Standards and Installation
Should meet the requirements set forth in EPG 616.27.1.5 Fleet Lighting Guidelines.

