Gallery of new files
Jump to navigation
Jump to search
This special page shows the last uploaded files.
-
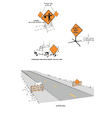 Figure 616.6.2.3 Methods of Mounting Signs Other Than on Posts.png Hoskir
13:53, 8 January 2026
644 × 710; 137 KB
-
-
-
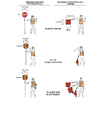 Figure 616.4.2 Use of Hand-Signaling Devices by Flaggers.png Hoskir
13:53, 8 January 2026
612 × 730; 118 KB
-
-
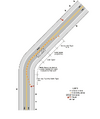 Figure 616.2.8 Example of a One-Lane, Two-Way Traffic Taper.png Hoskir
13:53, 8 January 2026
608 × 726; 130 KB
-
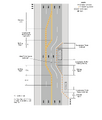 Figure 616.2.6 Types of Tapers and Buffer Spaces.png Hoskir
13:53, 8 January 2026
1,275 × 1,504; 297 KB
-
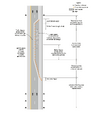 Figure 616.2.3 Component Parts of a Temporary Traffic Control Zone.png Hoskir
13:53, 8 January 2026
618 × 725; 97 KB
-
-
-
-
-
-

-
-
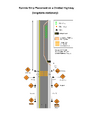 Figure 616.13.6.3 Rumble Strip Placement on a Divided Highway.png Hoskir
13:53, 8 January 2026
2,400 × 3,106; 361 KB
-
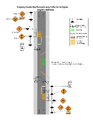 Figure 616.13.6.2 Temporary Rumble Strip Placement using Traffic Control Signals.png Hoskir
13:53, 8 January 2026
2,400 × 3,106; 427 KB
-
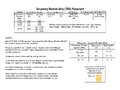 Figure 616.13.6.1 Temporary Rumble Strip Placement.png Hoskir
13:53, 8 January 2026
2,400 × 1,800; 485 KB
-
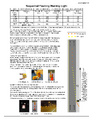 Figure 616.12.7 Sequential Flashing Warning Light.png Hoskir
13:53, 8 January 2026
2,400 × 3,106; 1.49 MB
-
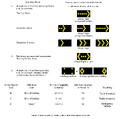 Figure 616.12.6 Advance Warning Arrow Board Specifications.png Hoskir
13:53, 8 January 2026
2,138 × 2,122; 138 KB
-
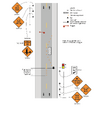 Figure 616.12.4 Example of the Use of a Red Yellow Lens Automated Flagger Assistance Device (AFAD).png Hoskir
13:53, 8 January 2026
1,275 × 1,480; 425 KB
-
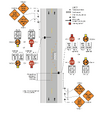 Figure 616.12.3 Example of the Use of a STOP SLOW Automated Flagger Assistance Device (AFAD).png Hoskir
13:53, 8 January 2026
1,275 × 1,491; 631 KB
-
-
-
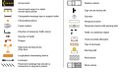 Figure 616.8.2 Meaning of Symbols on Typical Application Diagrams.jpg Hoskir
13:53, 8 January 2026
972 × 581; 65 KB
-
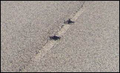
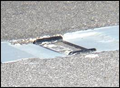
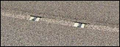
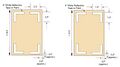 Figure 616.8.25 Examples of Markings on Steel Plates.jpg Hoskir
13:53, 8 January 2026
858 × 481; 41 KB
-

-
-
-
-
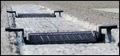
-
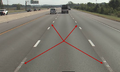
-
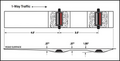
-
-
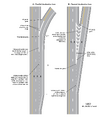 Figure 620.2.8.1 Examples of Dotted Line and Channelizing Line Applications for Exit Ramp Markings (Sheet 1 of 2).png Hoskir
09:22, 7 January 2026
1,325 × 1,500; 119 KB
-
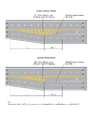 Figure 620.2.3.4 Marking for Median Islands for Left Turn Bays.png Hoskir
09:22, 7 January 2026
1,159 × 1,500; 64 KB
-
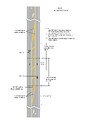 Figure 620.2.3.3 Application of Three-Lane, Two-Way Markings for Changing the Direction of the Center Lane.png Hoskir
09:22, 7 January 2026
2,138 × 2,951; 111 KB
-
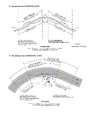 Figure 620.2.3.2 Method of Locating and Determining the Limit of No-Passing Zones at Curves.png Hoskir
09:22, 7 January 2026
2,186 × 2,976; 659 KB
-
-
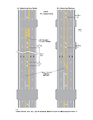 Figure 620.2.2 Example of Two-Way, Left-Turn Marking Applications.png Hoskir
09:22, 7 January 2026
1,500 × 1,942; 77 KB
-
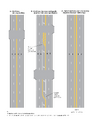 Figure 620.2.1.2 Yellow Center Lines for Four-or-More Lane, Two-Way Applications.png Hoskir
09:22, 7 January 2026
2,550 × 3,300; 139 KB
-
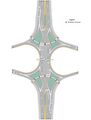 Figure 620.2.30 Example of Pavement Markings for a Diverging Diamond Interchange with a Transposed Alignment Crossroad.jpg Hoskir
09:22, 7 January 2026
2,138 × 2,814; 391 KB
-
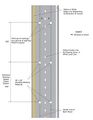 Figure 620.2.29 Pavement Marking for Aircraft Speed Check Stations.jpg Hoskir
09:22, 7 January 2026
542 × 698; 67 KB
-
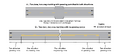 Figure 620.2.1.1 Yellow Center Lines for Two-Lane, Two-Way Applications.png Hoskir
09:22, 7 January 2026
1,500 × 697; 36 KB
-
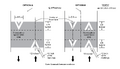 Figure 620.2.27.2 Pavement Markings for Speed Tables or Speed Humps with Crosswalks.png Hoskir
09:22, 7 January 2026
1,500 × 858; 58 KB
-
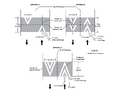 Figure 620.2.27.1 Pavement Markings for Speed Humps without Crosswalks.png Hoskir
09:22, 7 January 2026
1,500 × 1,171; 77 KB
-
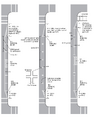 Figure 620.2.26 Example of Parking Space Markings.png Hoskir
09:22, 7 January 2026
1,177 × 1,500; 315 KB
-
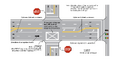 Figure 620.2.25 Do Not Block Intersection Markings.png Hoskir
09:22, 7 January 2026
2,550 × 1,305; 134 KB
-
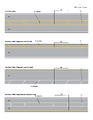 Figure 620.2.24 Typical Chevron and Diagonal Markings.png Hoskir
09:21, 7 January 2026
2,550 × 3,300; 119 KB
-
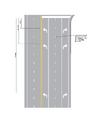 Figure 620.2.22.3 Spacing of Arrow in Left-Turn and Right-Turn Lanes.png Hoskir
09:21, 7 January 2026
1,159 × 1,500; 30 KB


.png)
.png)


.png)


